Set Up a Material
Materials are created at the Owner and Project level and describe the specific details of your Inventory. The setup steps detailed below allow further configuration of the Materials in the Warehouse.
1. Click Owners in the left navigation menu and select Materials.
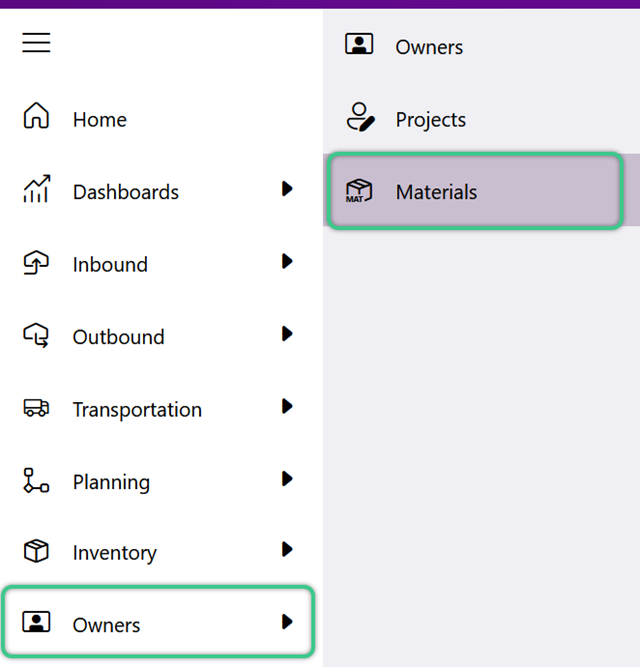
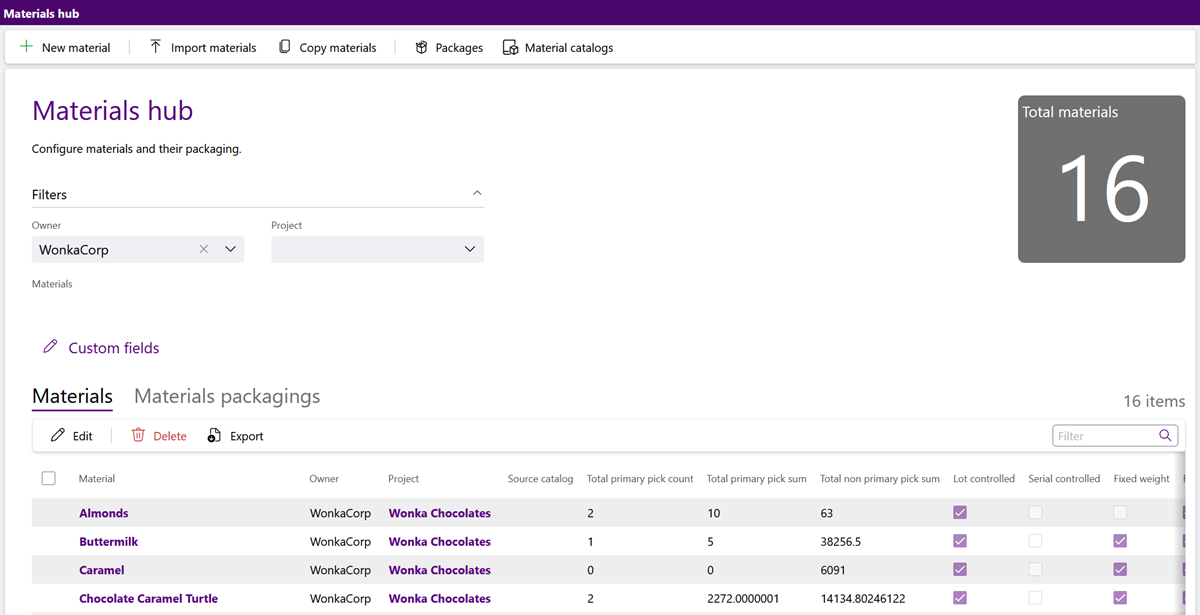
The Materials Hub will display.
1. Click + Create Material in the top menu.
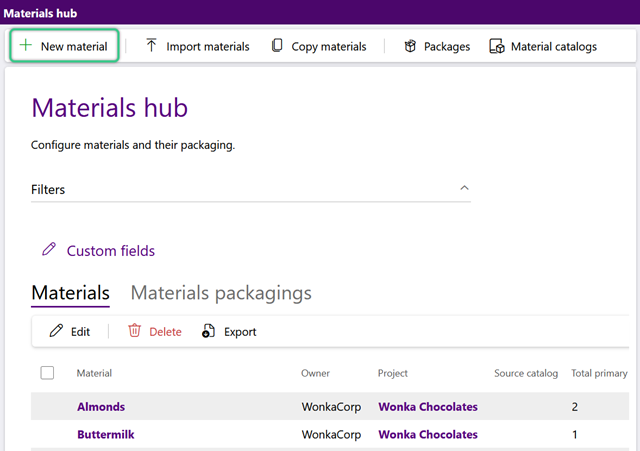
The New Material window will display.
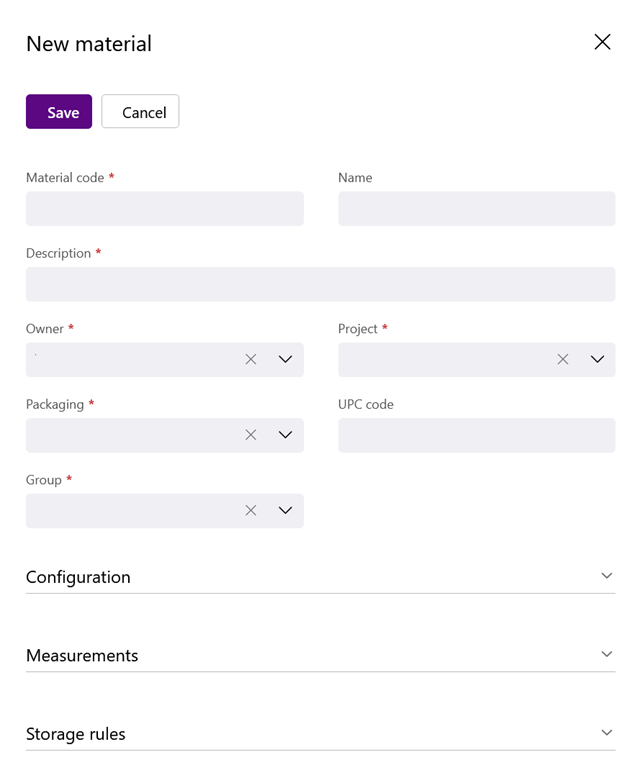
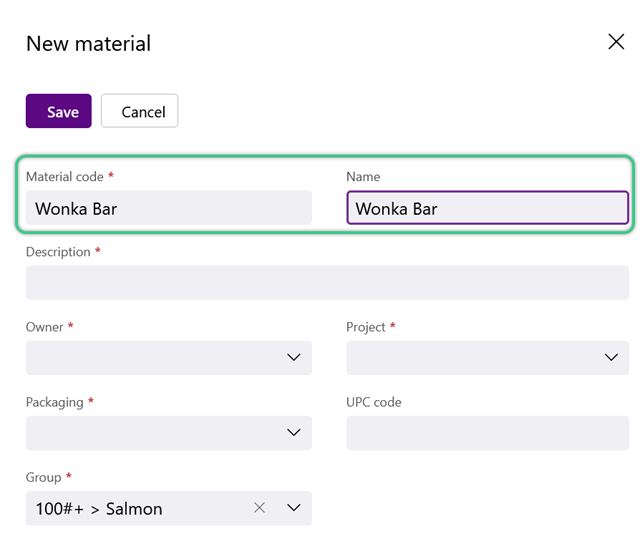
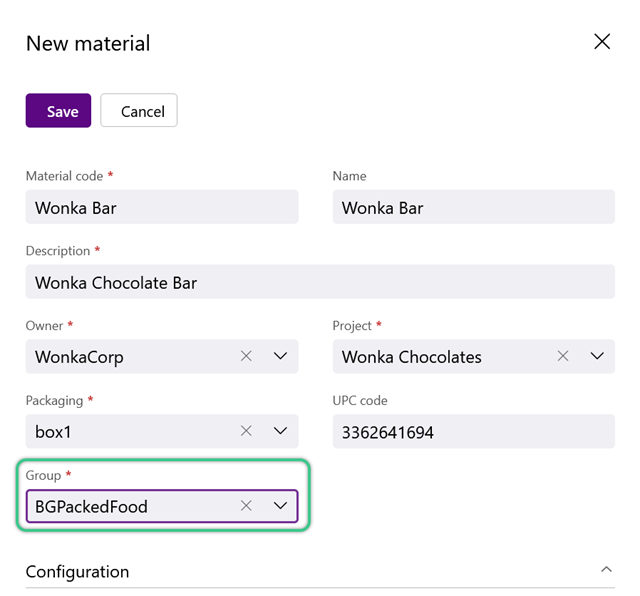
1. Enter a required short Material Code used to reference the material, and an optional Name for the material.
Note
The required details are indicated with a red asterisk - all other details are optional and can be filled out, but are not necessary. See the Materials Guide for more information.
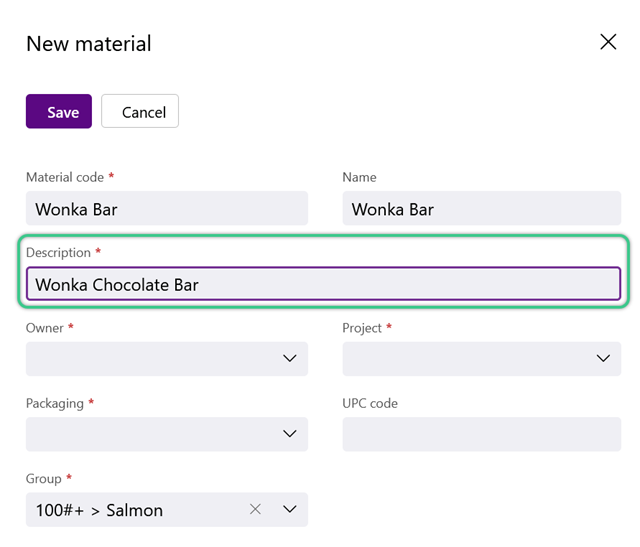
2. Enter a required Description for the new material.
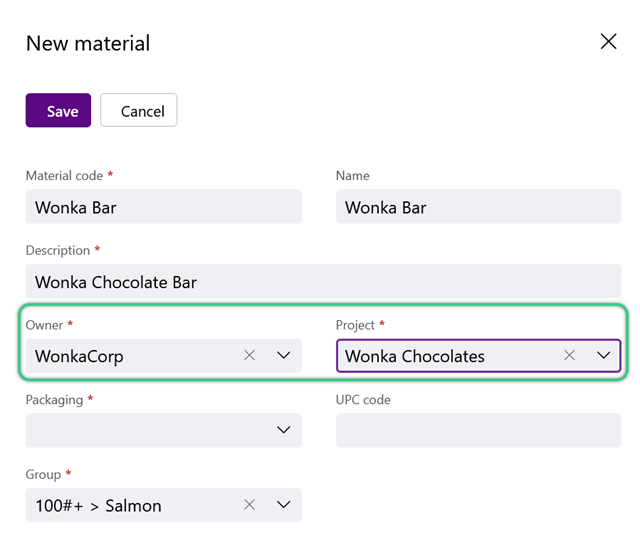
3. Select the required Owner and an affiliated Project.
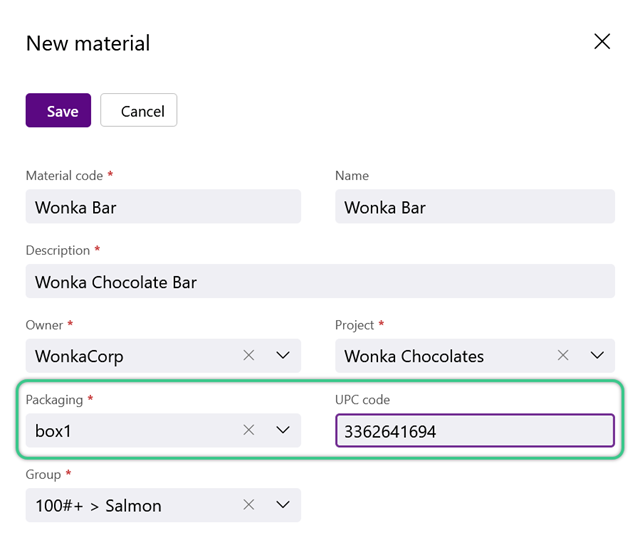
4. Select a required Packaging from the drop down and enter one or more optional UPC Codes, separated by a comma.
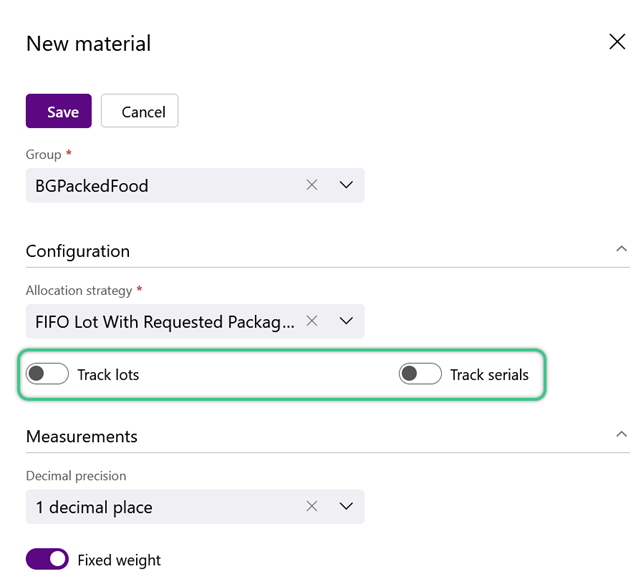
5. Select a required material Group.
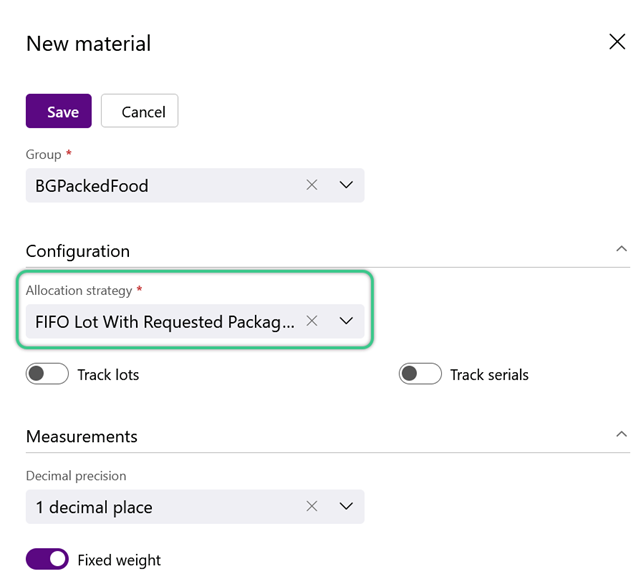
The Allocation Strategy takes into account related material information when creating Pick Slips for Outbound Shipments. This allows Inventory to be selected to Ship based on set preferences. For example, First Expired, First Out (FEFO) and First In, First Out (FIFO).
1. Select a required Allocation Strategy.
- FEFO - First Expired, First Out. Inventory whose Expiration Dates are nearest are assigned to Orders.
- FIFO - First In, First Out. The Inventory that entered your Warehouse first are assigned to Orders before newer Materials.
- FMFO - First Manufactured, First Out. The Inventory that were originally manufactured first are assigned to Orders before newer Materials.
- LEFO - Last Expired, First Out. The Inventory whose Expiration Dates are furthest away are assigned to Orders.
- Largest Package First - Prioritizes Packaging Types with larger physical dimensions over those with smaller, so that larger items are assigned to Orders first.
- Requested Package First - Prioritizes the Packaging Type specified on the Order Line over any other Packaging Types, so that the requested Packaging is assigned to Orders whenever available.
- Requested Package Only - Only allows the Packaging Type specified on the Order Line to be assigned to the Order.
- By Lot - The FIFO / FEFO / FMFO / LEFO rules consider the create / expiration / manufacture date of the Inventory's assigned Lot.
- By LP - Available as a FIFIO option, prioritizing the oldest License Plates in your Warehouse for Orders over newer LPs.
- Lot with LP - The general FIFO / FEFO / FMFO / LEFO rules consider the create / expiration / manufacture date of the Inventory's assigned Lot, and then prioritize the oldest License Plates in your Warehouse from that Lot as the ones to assign to the Order.
By selecting which option you would prefer here, you are telling the system to automatically search through that information when creating Pick Slips for Outbound Shipments, and choose what Inventory to Ship based on your preference.
Tip
These options will only work when a material is lot controlled. However, checking the Use License Plate FIFO box allows the Allocation to be done based on the License Plates to which the material is assigned.
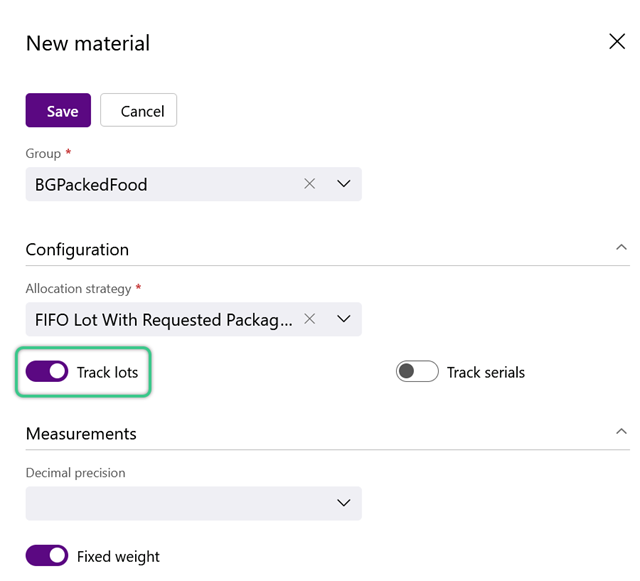
2. To track individual Lots of this new material, click the Track Lots toggle to ensure the material will be lot controlled.
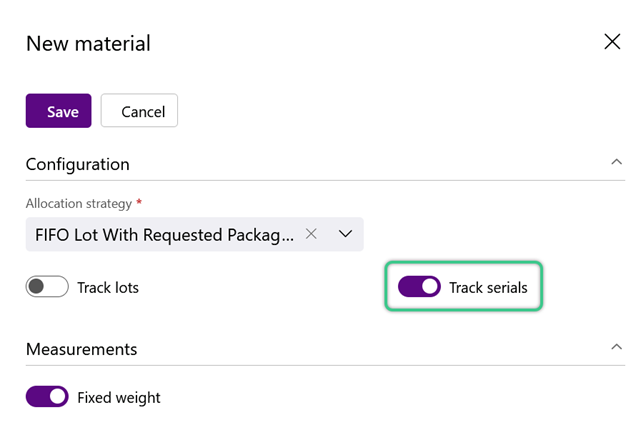
3. To track product Serial Numbers/custom fields, as well as assign these materials a Generic Lot, or Glot, click the Track Serials toggle to ensure the material will be serial controlled.
If tracking of lots/serial numbers is not required, leave both toggles off. These materials will be assigned a Generic Lot, or GLot.
If tracking both lots and serial numbers/custom fields, toggle on both options.
Warning
Be sure to enter values here, otherwise they will default to '1' upon creation of the new material.
1. Set the Decimal Precision for the new material's measurements.
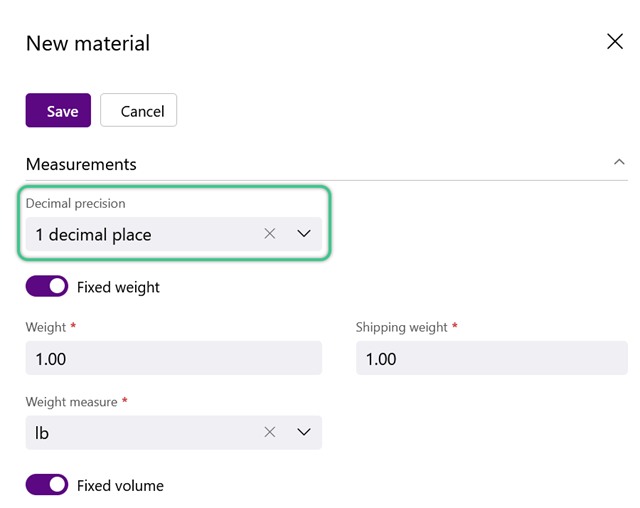
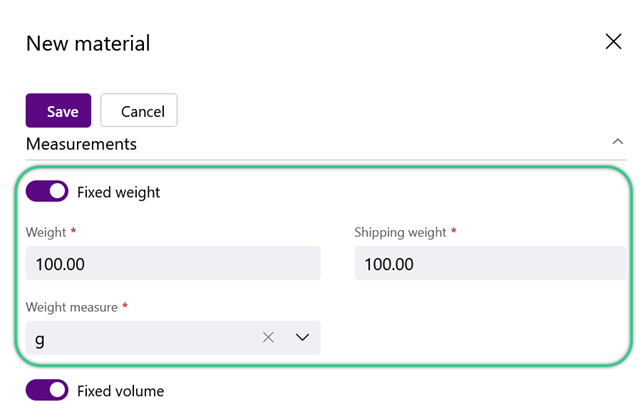
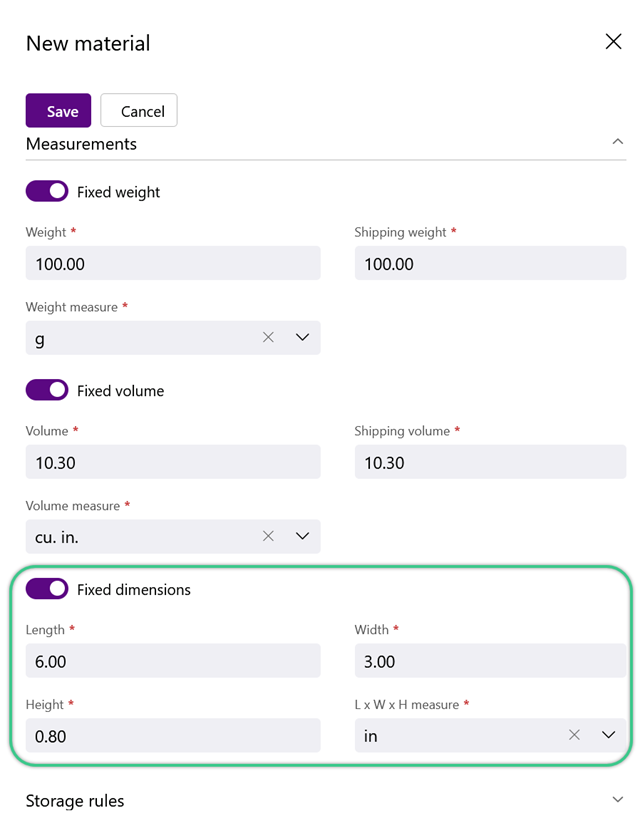
2. Indicate whether or not the material has a Fixed Weight.
3. Specify the required Weight (weight before additional shipping packaging) and Shipping Weight (total weight), then select the Weight Measure.
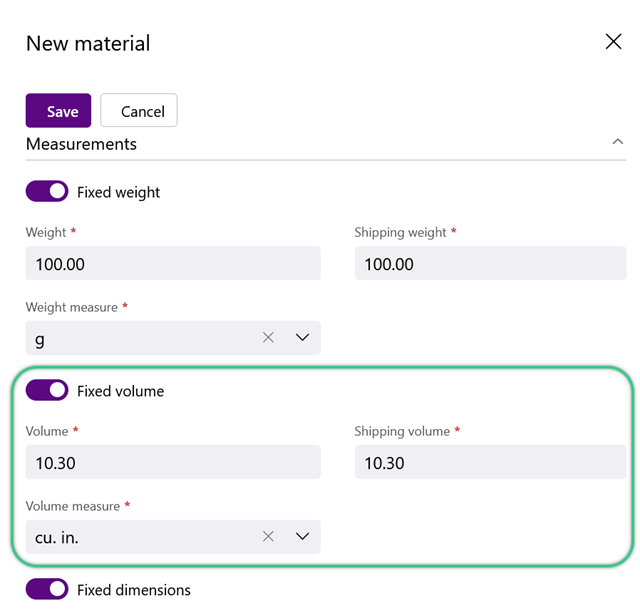
4. Indicate whether or not the material has a Fixed Volume.
5. Specify the required Volume (volume before additional shipping packaging) and Shipping Volume (total volume), then select the Volume Measure.
6. Indicate whether or not the material has a Fixed Dimension.
7. Specify the required Length, Width, and Height of the material, then select the L x W x H Measure.
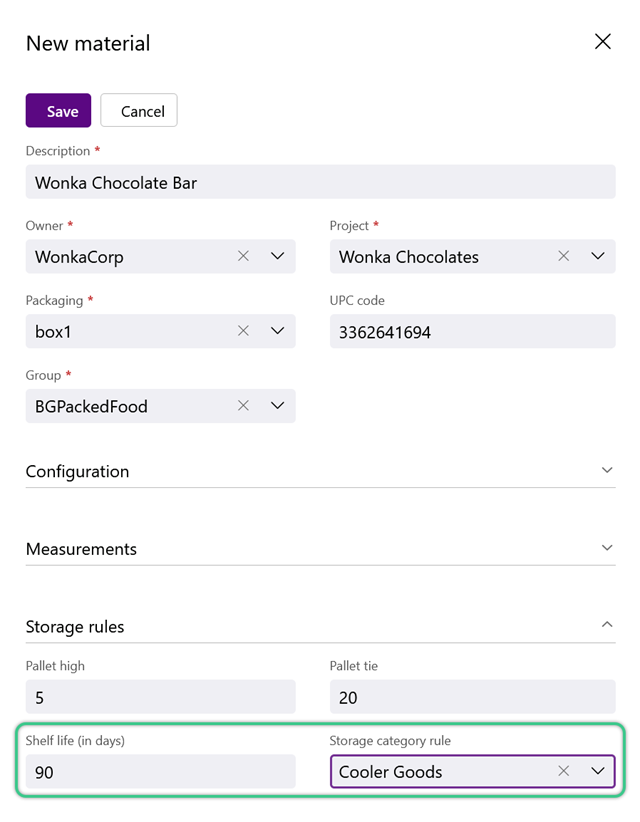
When possible, specify the material's optional Storage Rules, as these settings contribute to a more accurate Suggested Putaway and calculating Expiration Dates.
1. Enter the Pallet High and Pallet Tie.
Pallet High is how many units high the Package can be stacked atop itself, while the Pallet Tie is how many units to set down before stacking.

2. Enter the material's Shelf Life and select a Storage Category Rule.
Tip
Storage Category is the new field introduced in Footprint to capture Temperature Categories, in addition to other storage category types.
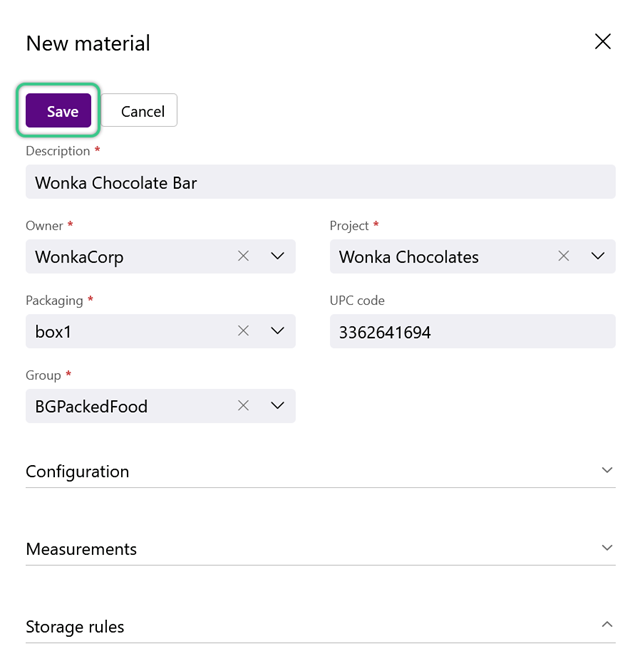
1. Click the purple Create button in the top left corner of the New Material window.
Once a Material has been created, there are many more options that can be configured for the Material in the Warehouse. For more on how to fully configure a new Material, please visit our Set Up a Material article.
The new material is now available for further setup. For comprehensive setup options, please visit the Setup a Material tutorial.
After a Material is created, there are more details that can be setup for it.
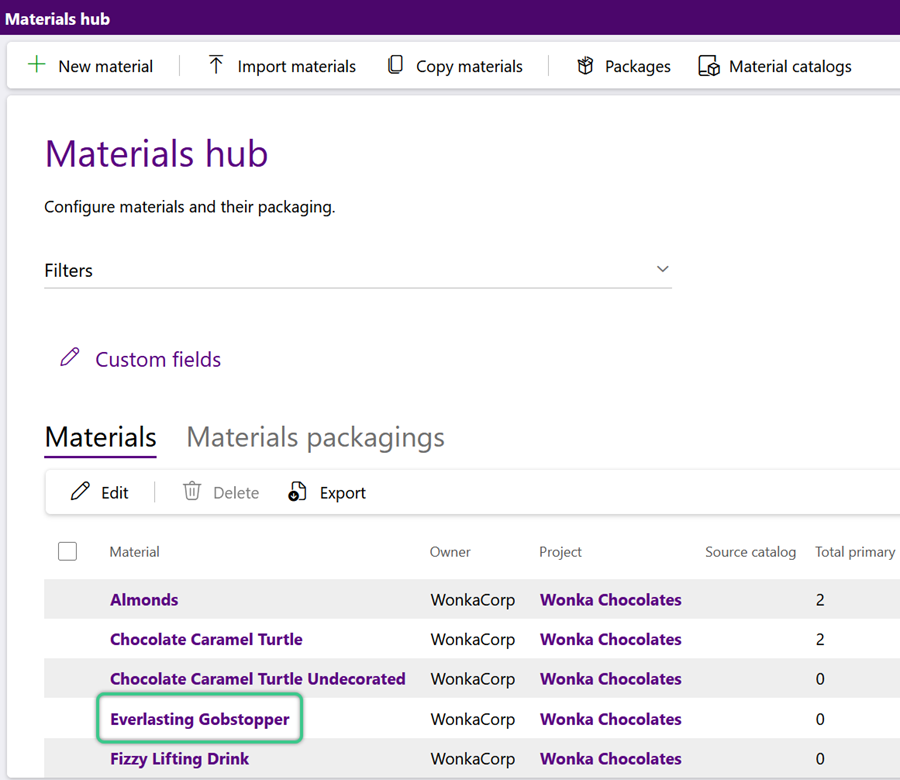
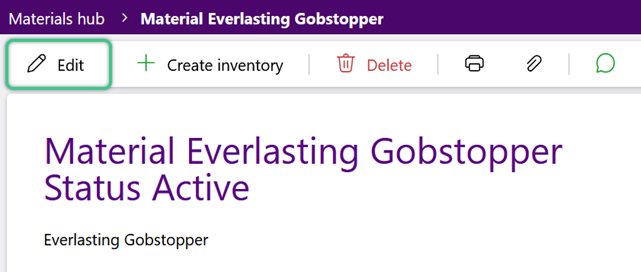
1. Click the Name in the Materials Hub to open the Material record for further setup.
There are additional Configuration and Manufacturing setup options only available in a Material's Edit Material window. For complete descriptions of these additional fields, please refer to the Materials Guide.
Note
Much of the information and rules set here cannot be changed while you have any units of this Material in your Warehouse. Once all of a Material's Inventory has been removed, then edits can once again be made.
1. Click Edit in the top Material record toolbar.
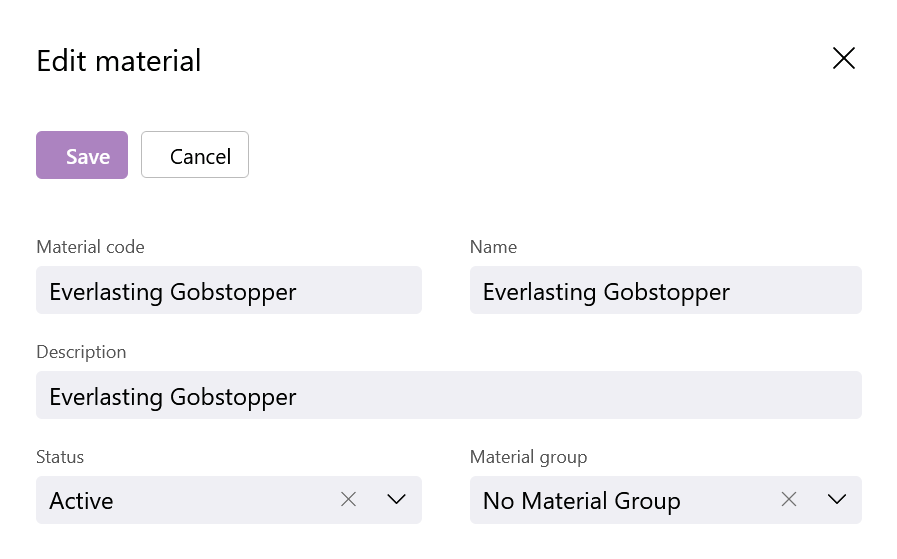
1. Update any of the following basic details:
-
Material Code
-
Name
-
Description
-
Status
-
Group
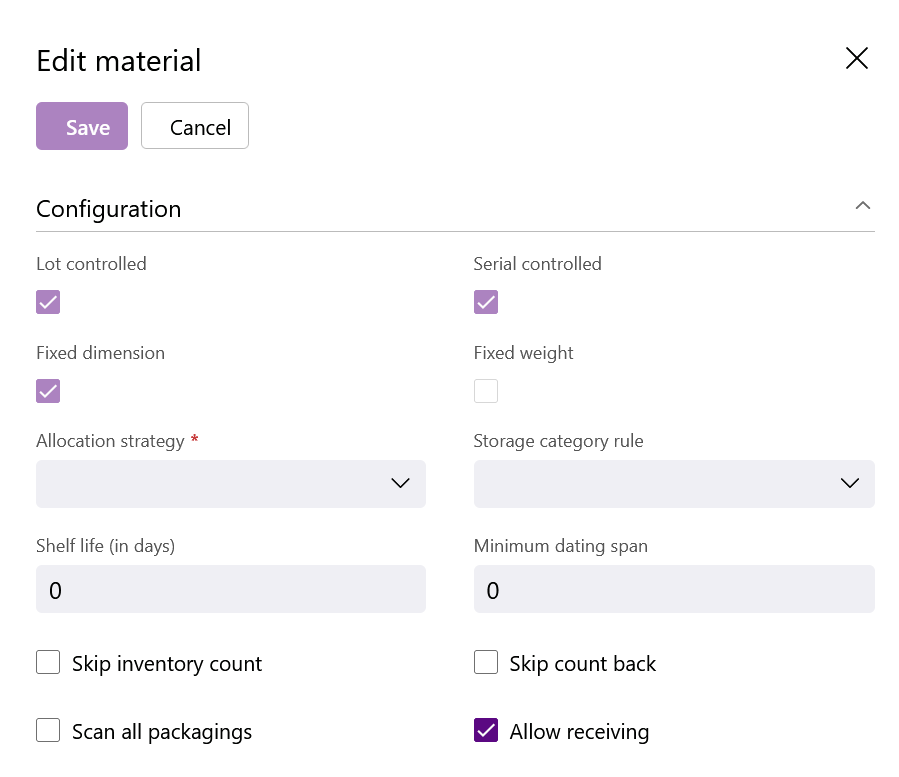
1. Update any of the following Configuration details:
-
Lot Controlled
-
Serial Controlled
-
Fixed Weight
-
Allocation Strategy
-
Storage Category Rule
-
Shelf Life
-
Minimum Dating Span
-
Skip Inventory Count
-
Skip Count Back
-
Scan All Packagings
-
Allow Receiving
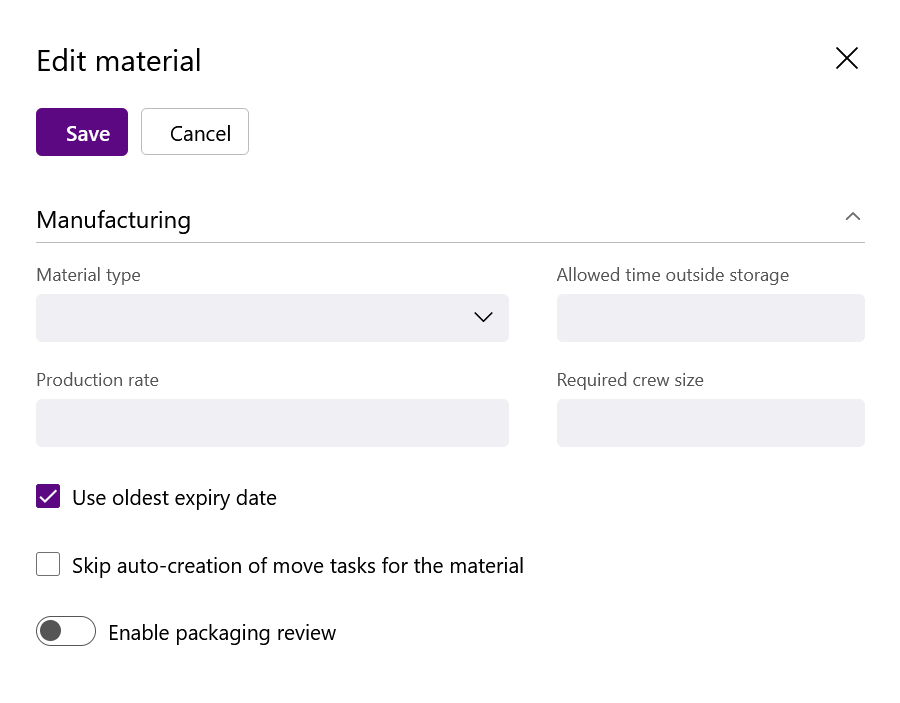
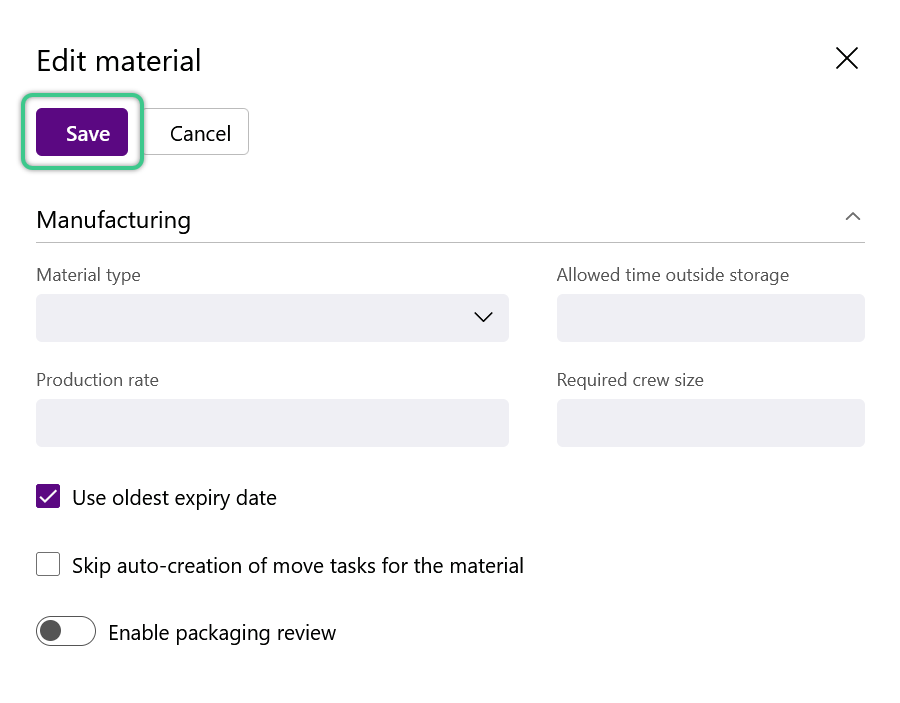
1. Update any of the following Manufacturing settings:
-
Material Type
-
Allowed Time Outside Storage
-
Production Rate
-
Required Crew Size
-
Use Oldest Expiry Date
-
Skip Auto-Creation of Move Tasks
-
Enable Packaging Review
-
Set Packaging Review Reminder
-
Review New Packaging Type After (in Days)
1. Click Save in the top left corner of the Edit Material window.
The Material is now ready for use as Inventory.
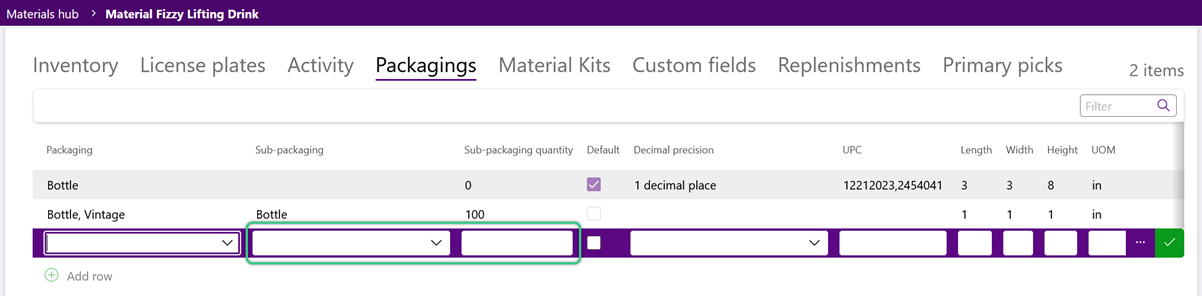
Now that we've entered the basics, let's move on to the Packagings tab, where we will select our Packaging. Add as many levels of Packaging as are needed.
Note
A Material must have at least one Package level - the Base Package.
1. Click the Packagings tab.
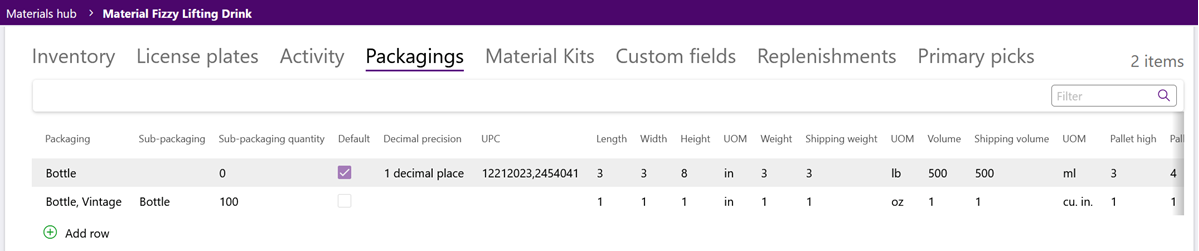
2. Click the green + Add Row option in the bottom left corner of the tab.
3. Enter the Base Packaging details.
For more information about these Packaging Details, please visit the Materials Guide.
4. Click the green check mark at the end of the row to Save the Base Packaging.
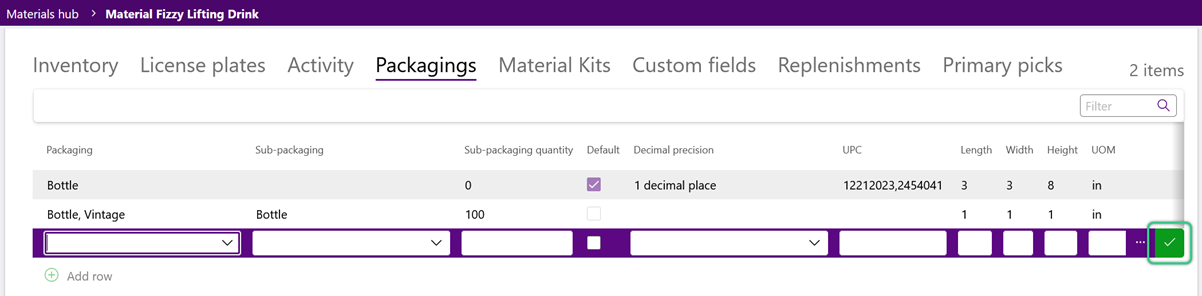
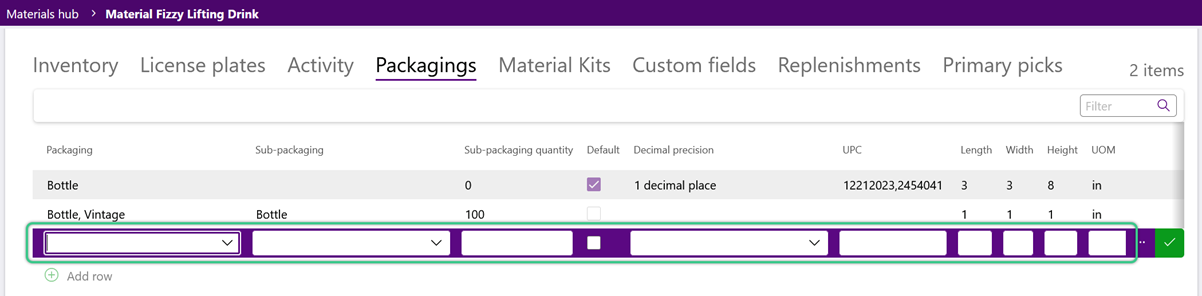
1. Repeat the steps for as many levels of Packaging as are needed for the Material, being sure to select the correct sub-packaging from the Sub-Packaging field.
2. In the Sub-Package Quantity field, enter the number of smaller Packages it takes to fill the Base Packaging level.
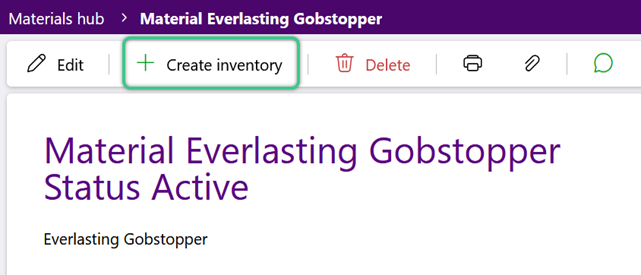
1. Click the + Create Inventory option in the top toolbar.
2. In the Create Inventory window, select the required Owner and an affiliated Project, if they are not already set.
3. Select a required Warehouse, then tab to select the Inventory Material to be added, if they are not already set.
4. Select the required Packaging and enter the Quantity of the Inventory.
5. Select a Location and use the toggle indicating whether or not the new Inventory will require a New License Plate.
6. Enter or select a License Plate number for the new Inventory, then select a Reason Code for adding the new Inventory to the warehouse.
7. To continue adding new Inventory to the Warehouse, click the Confirm and New button in the top of the Create Inventory window.
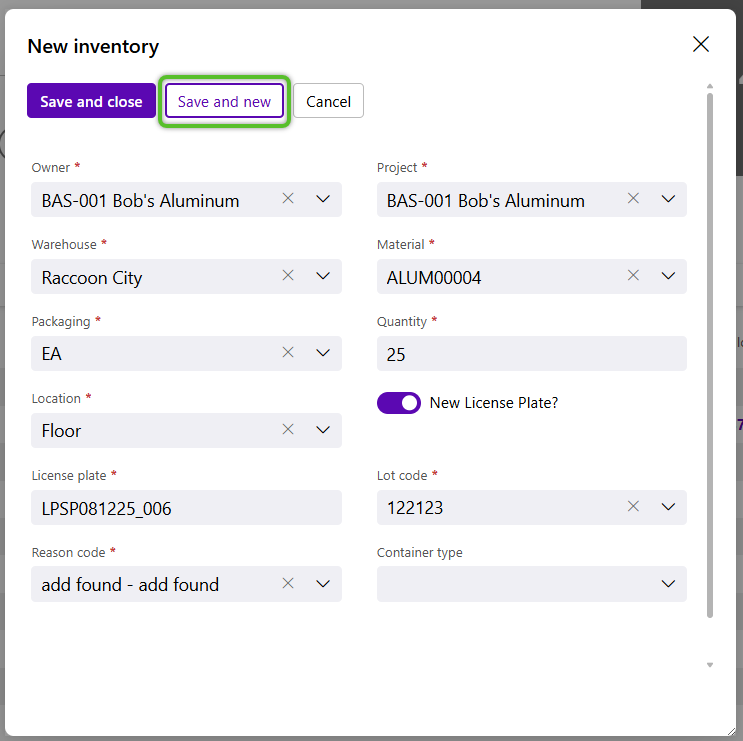
8. Once all Inventory information has been set, if no more Inventory needs to be added, click the Confirm and Close button in the top left corner of the Create Inventory window.
The new Inventory will now be available for use in the specified warehouse.

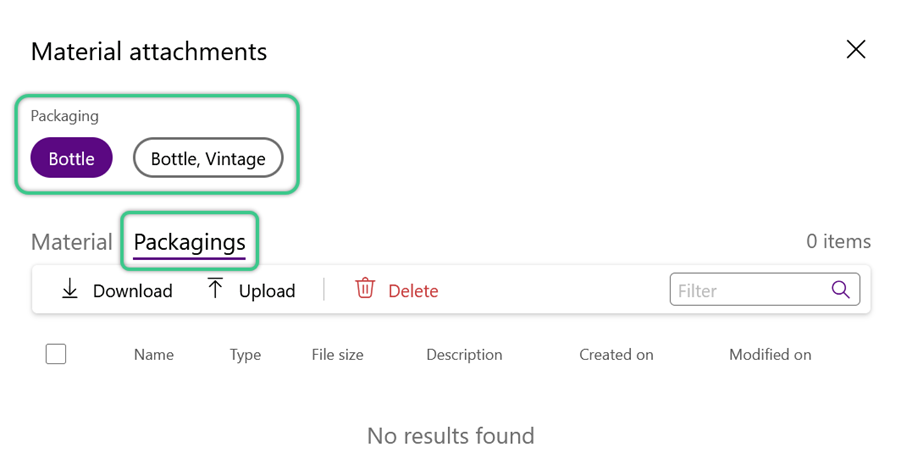
The Material Attachments window allows users to view and upload file, including images, to correspond with a Material or its Packaging. Images files added here are used throughout the rest of Footprint to assist users in visually identifying the inventory in the warehouse.
1. Click the Attachments icon in the top toolbar.
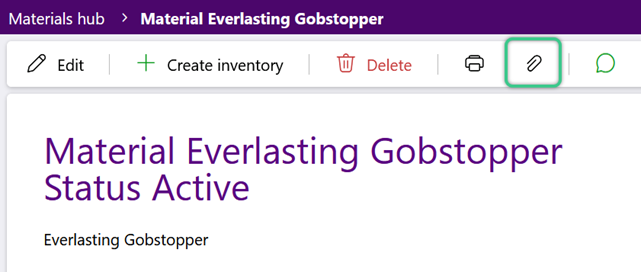
2. In the Material Attachments window, if the attachment is for a Material, click the Upload option on the Material tab.

3. Click the Packaging tab, then select the correct Packaging Type (when multiple exist) before uploading a Packaging file.
This assists in picking and packing when it may be confusing to a user whether an item is an each, case, pack, bundle, etc.
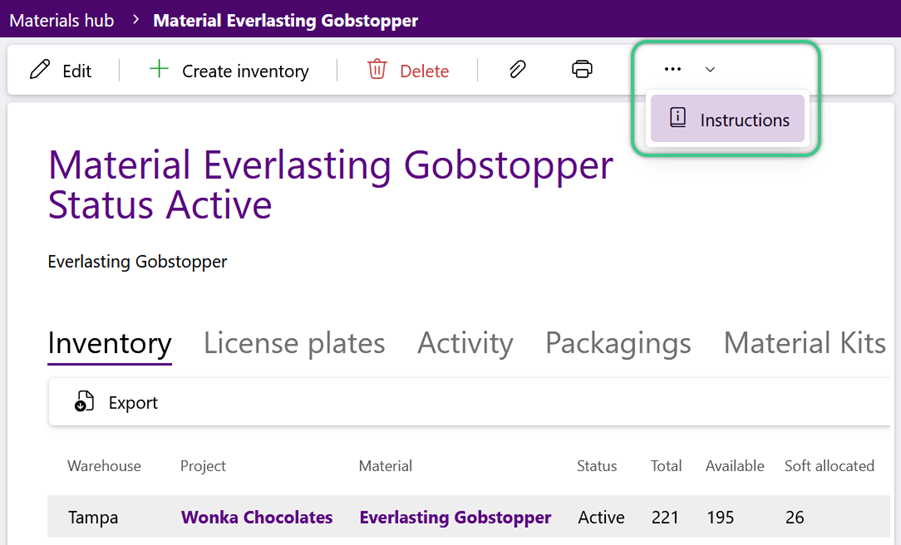
Material Instructions can be setup to display for users working with the Material on specific pages in Footprint.
1. Click the Options dropdown icon in the Material Record toolbar and select Instructions.
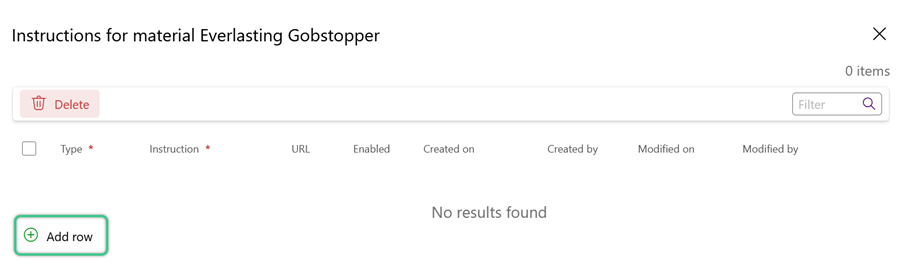
2. Click the green + Add Row option in the bottom left corner of the Material Instructions window.
3. Select the Type of Instruction, enter the Instruction text, the URL where the Instruction should be displayed, and check the Enabled box.
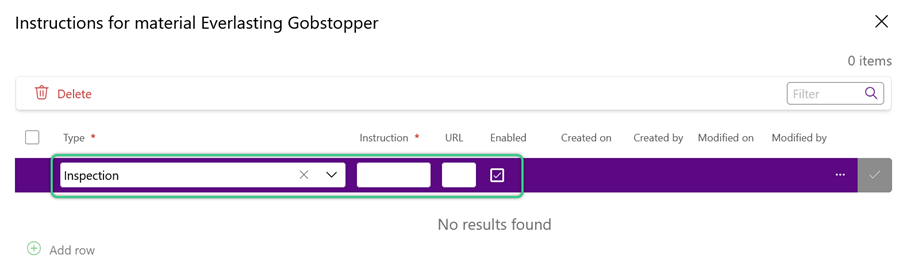
4. Click the green check mark at the end of the row to Save the Material Instruction.
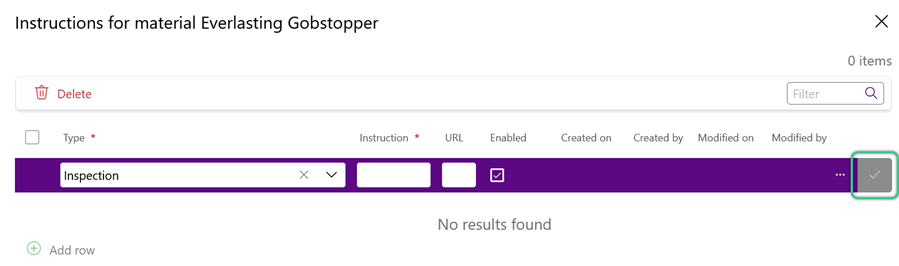
To delete a selected Instruction for a Material, click the Delete button.
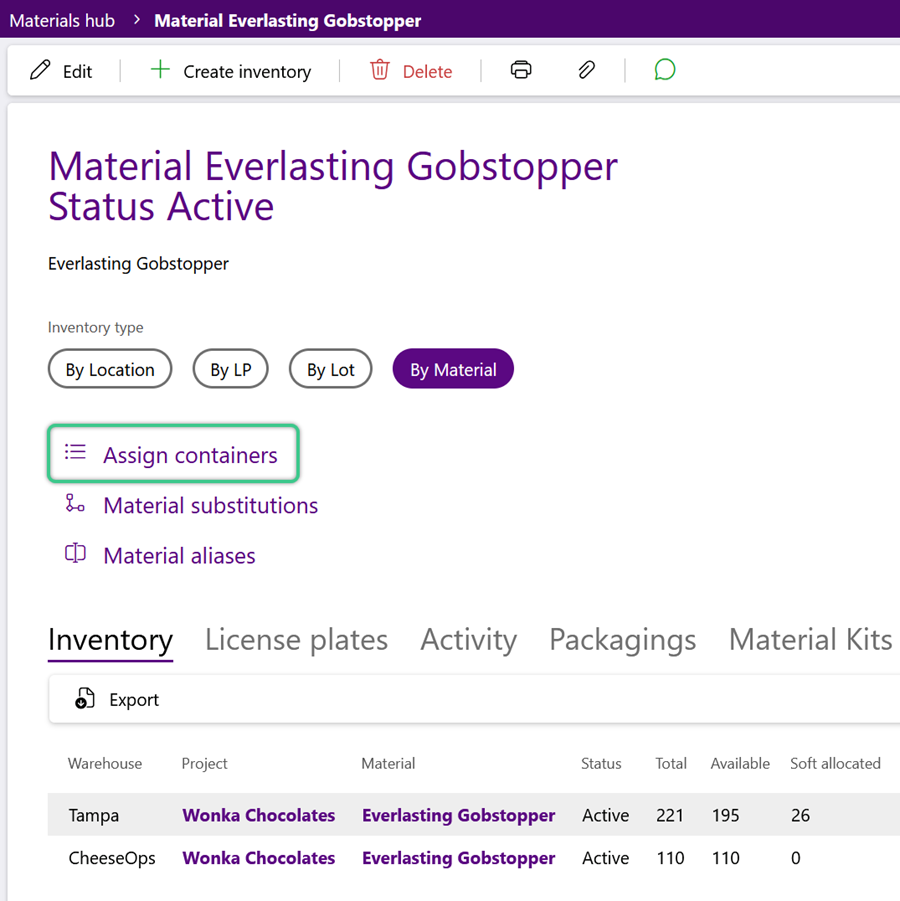
1. Click the Assign Containers option.
2. In the Container tab, click the Assign Containers button to open and select a Container, or click the green + Add Row option to create a new one.
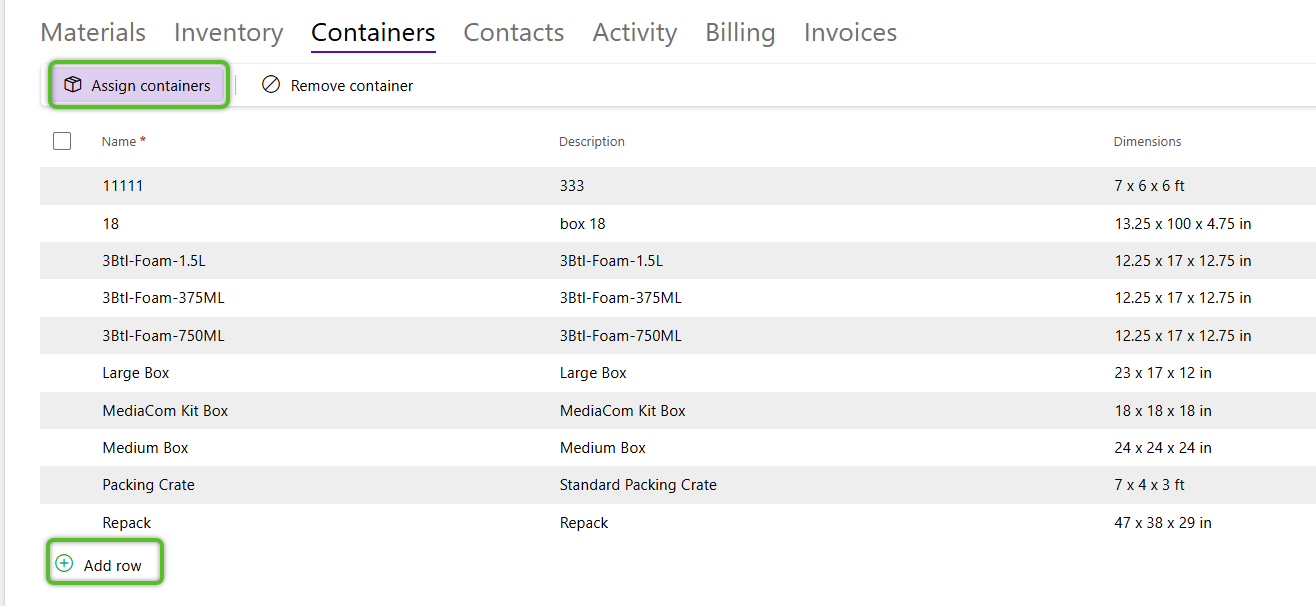
The container will now appear on the list of containers assigned.
3. Repeat the process to assign as many Containers as needed.
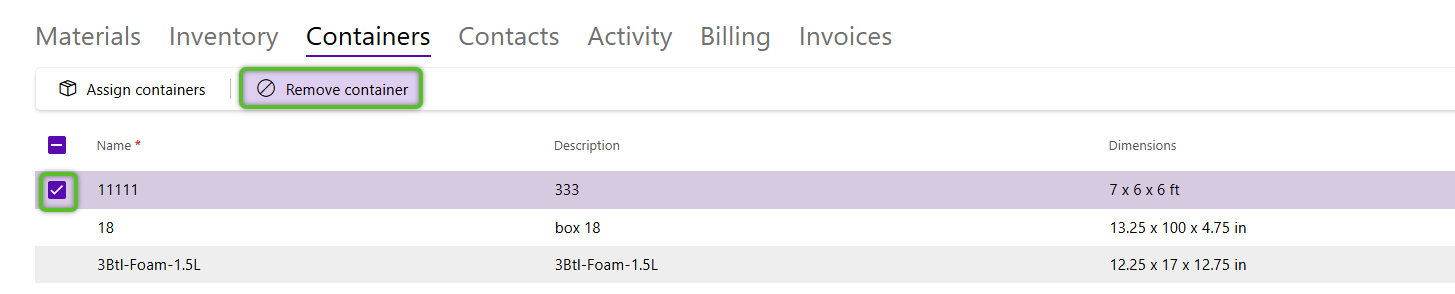
To remove a Container, check the box for the Container row, then click the Remove Container option.
Material Substitutions allow the set up of additional Materials which could be used to replace the current Material (the Material being edited) when it is not available. These substitute Materials can be leveraged through custom Outbound Order Processing Workflows, to make decisions on Material Substitutions based on Inventory levels.
1. Click the Material Substitutions option.
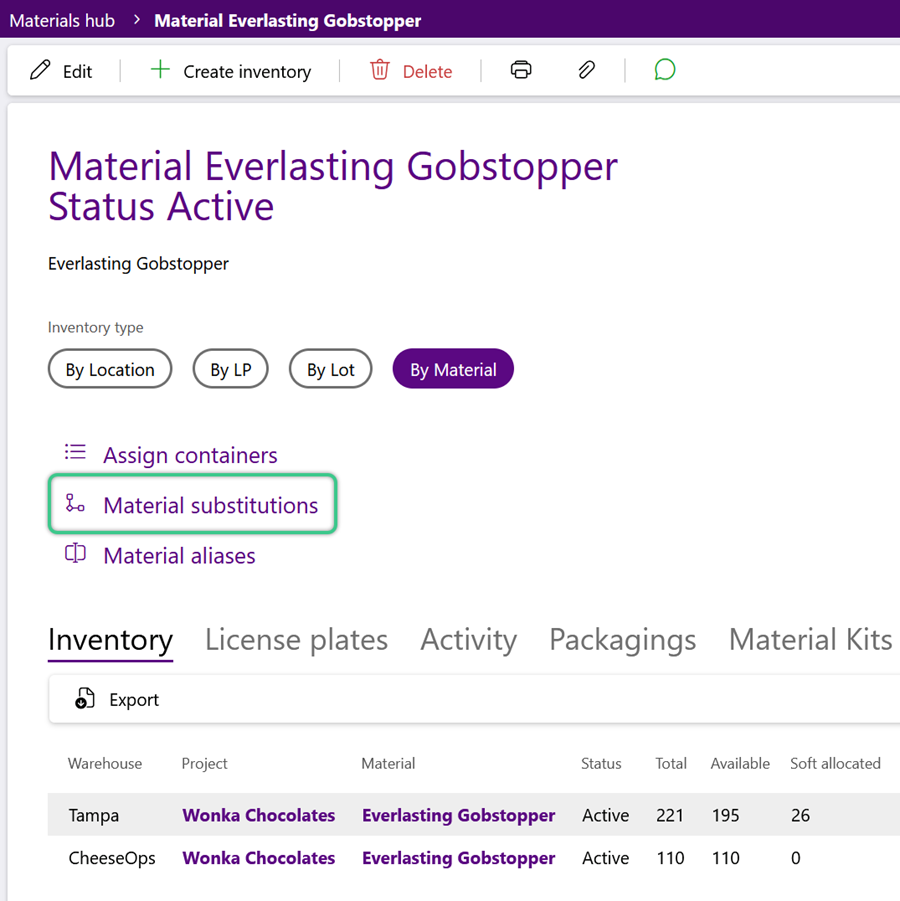
2. Before adding Material Substitutes, first select the Material Packaging of the current Material to be replaced by the substitute when needed.
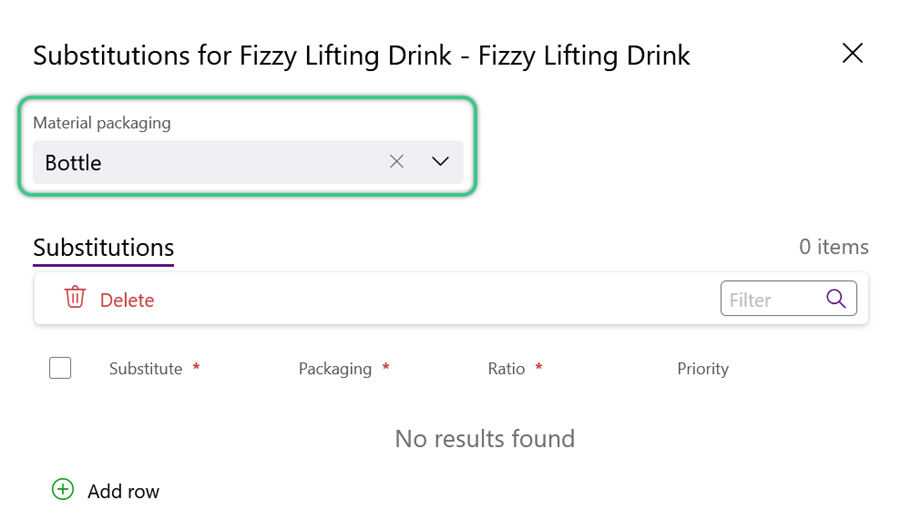
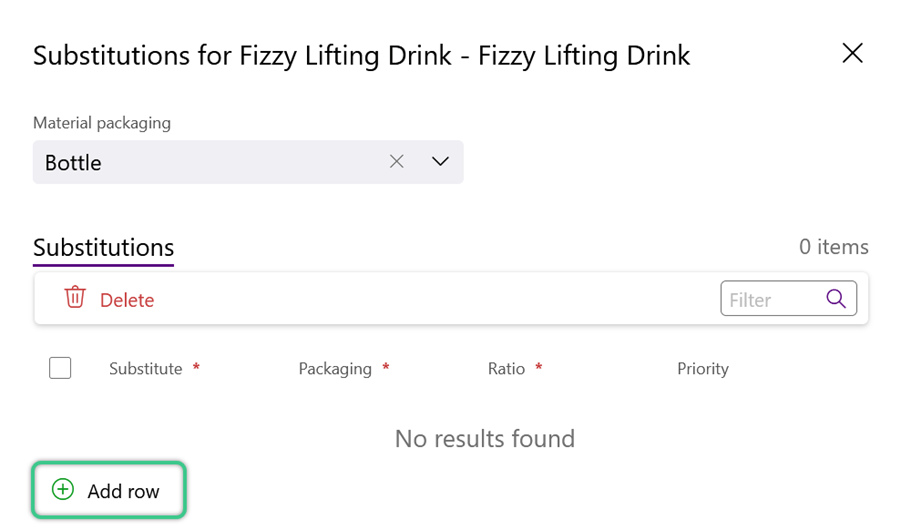
3. Click the green + Add Row option to add a new Material Substitution.
Material Aliases allows different customers to see a different Material Name when the Material is displayed in Reports and Workflows. There is also the option to reduce the sales order cost of the Material by a specified percentage for each customer account.
1. Click the Material Aliases option.
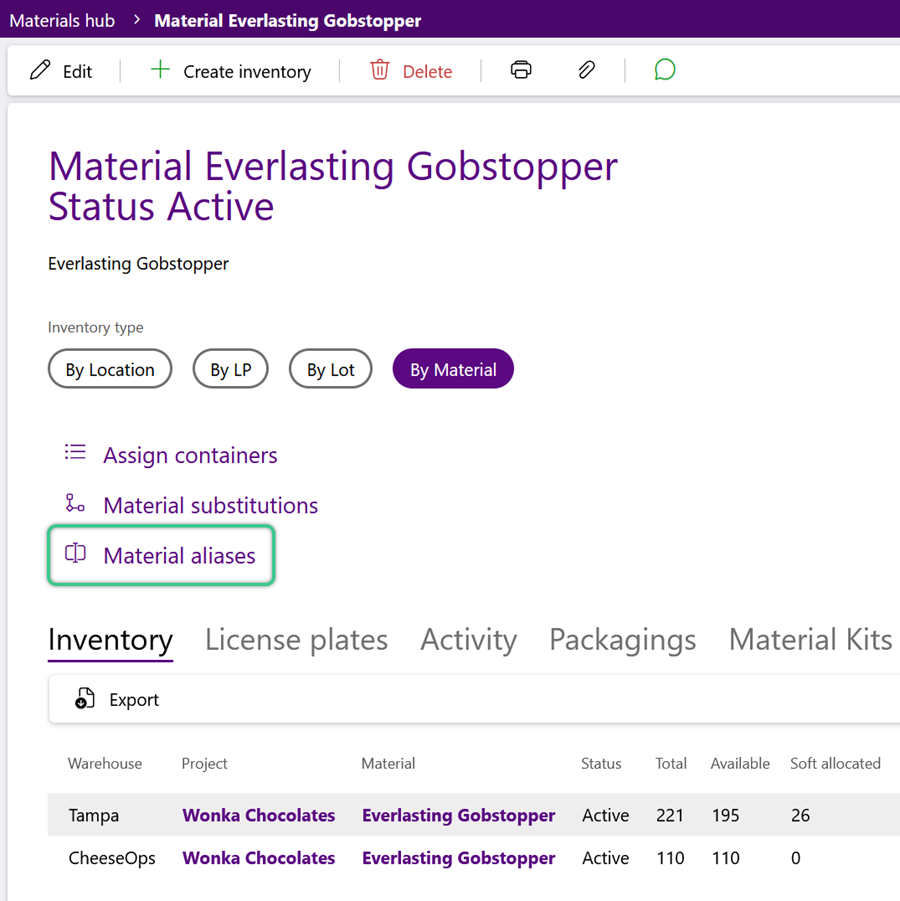
2. Click the green + Add Row option to add a new Material Alias for a client Account.

Kits are groupings of Materials into one new Material. Kits can be used for Manufacturing, which will automatically determine required quantities based on the Kit Components.
Example
A Table Material Kit may be composed of four Table Leg Materials and one Table Surface Material.
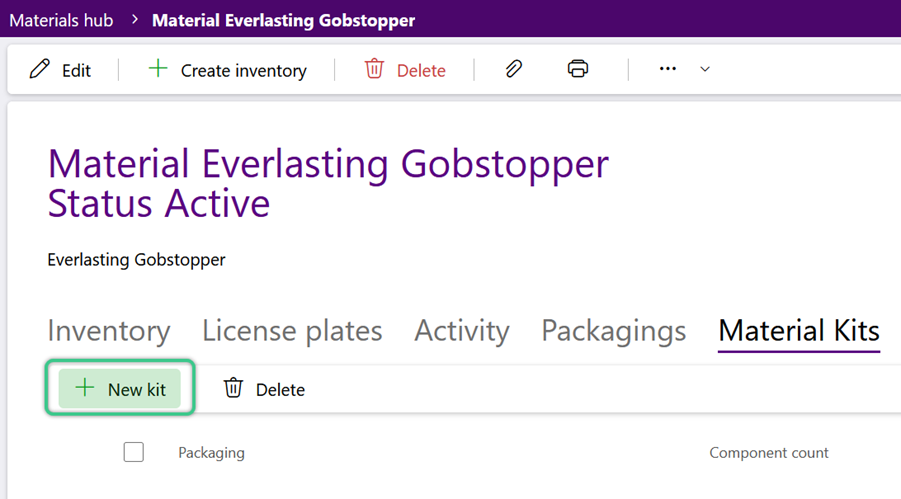
1. Click the Material Kits tab.
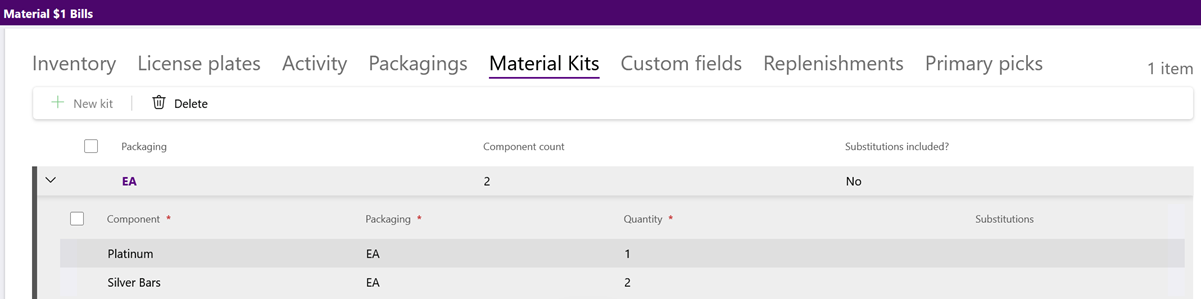
2. Click the green + New Kit button in the tab toolbar.
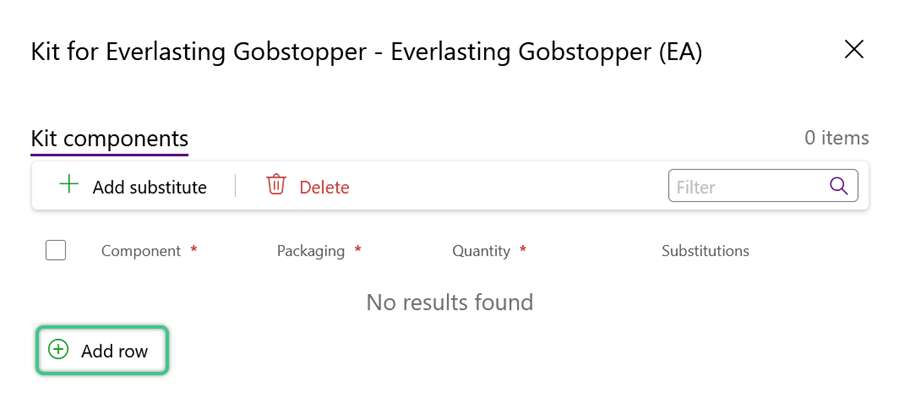
3. Click the green + Add Row option in the bottom left of the Material Kit window to add a Kit Component Material. For more details on Material Kits and Components, please visit the Materials Guide.
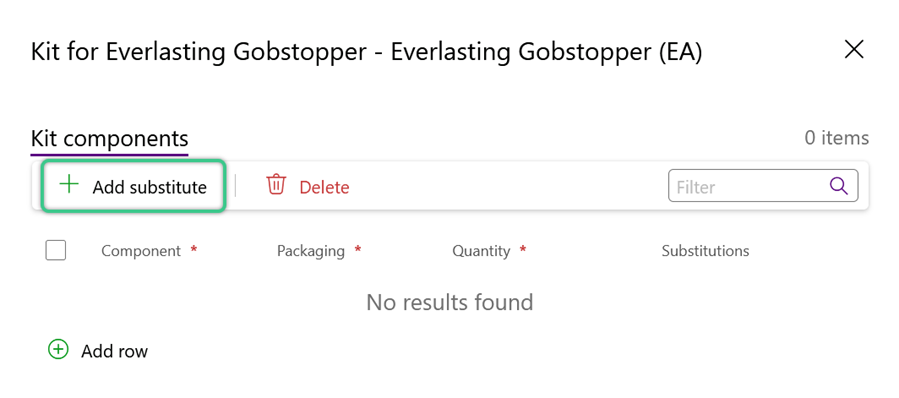
4. Click the green + Add Substitute button to add a Material Component substitute, when needed.
Repeat the steps for all Materials required to complete the Kit.
Any Custom Fields you have setup for Materials can be entered in the Custom Fields tab.
1. Click the Custom Fields tab.
2. Enter the requested details for each of the custom fields.

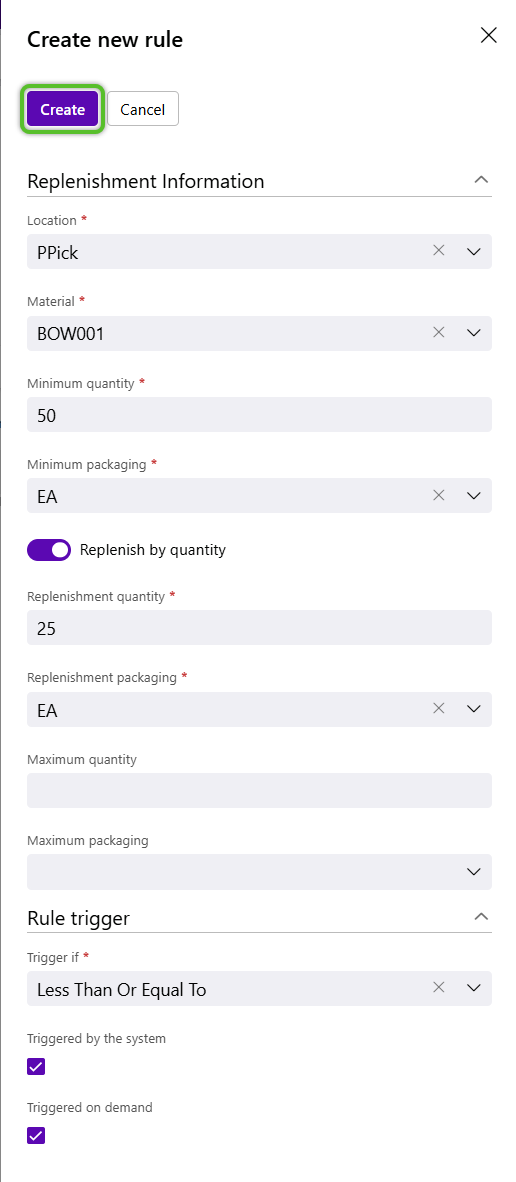
Replenishments are assigned at the Location level under the Replenishment tab.
1. Click + Add Rule in the Material's Replenishment tab toolbar.
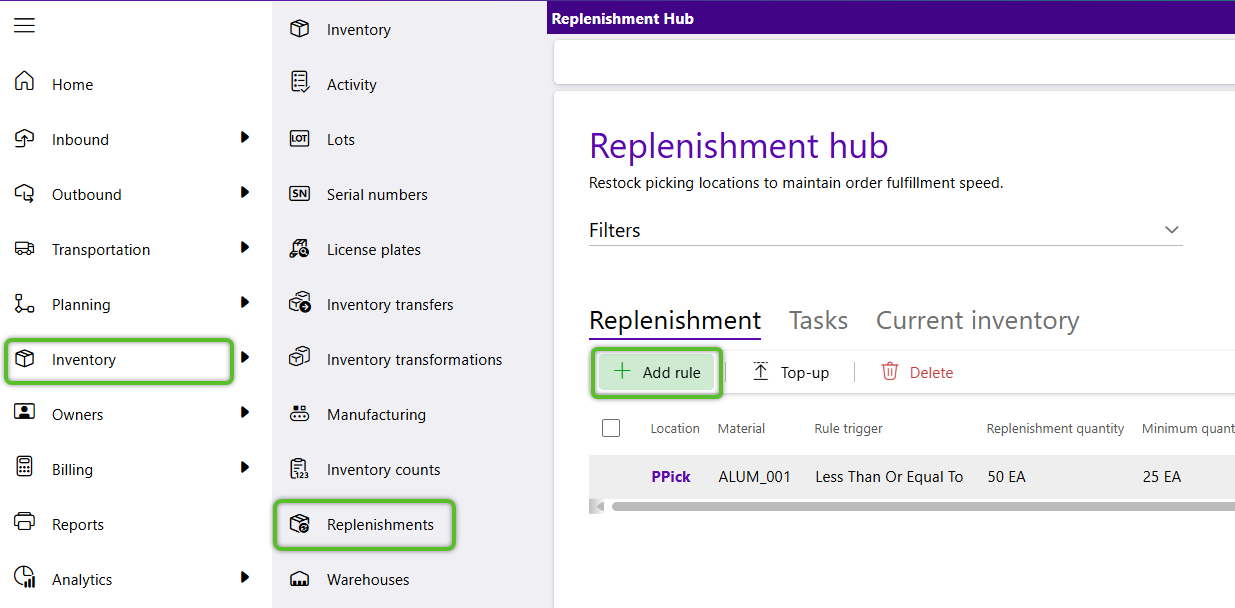
The Create New Rule window will display along the right side of the page.
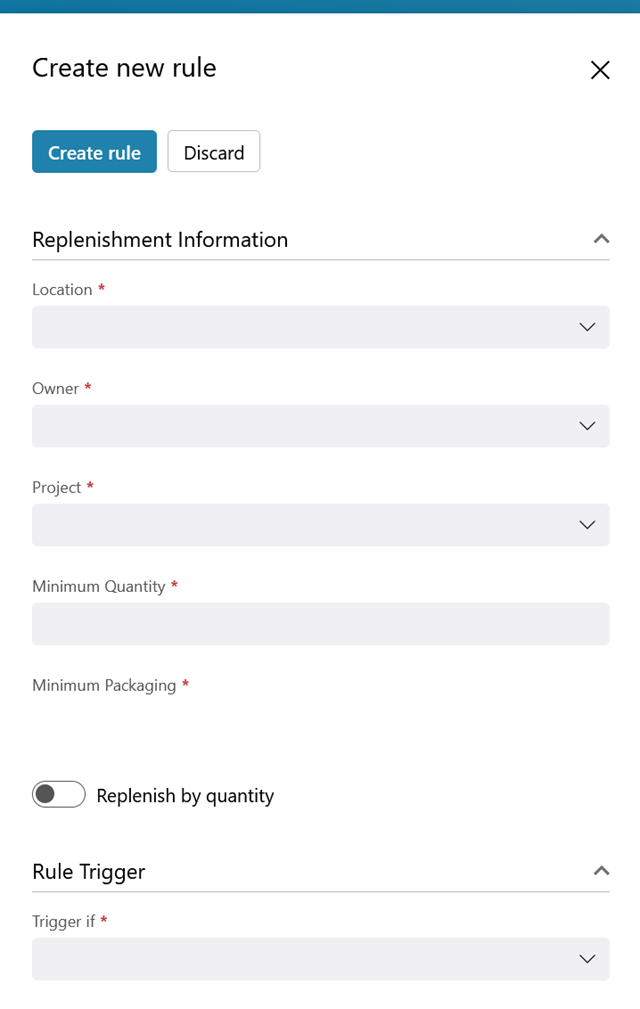
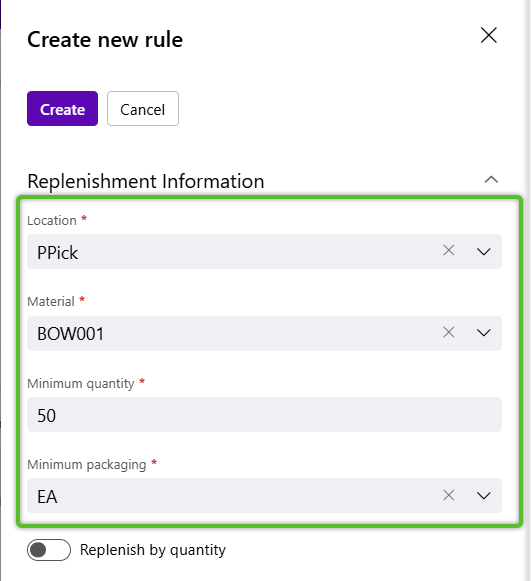
1. In the Replenishment Information section, select the required Location.
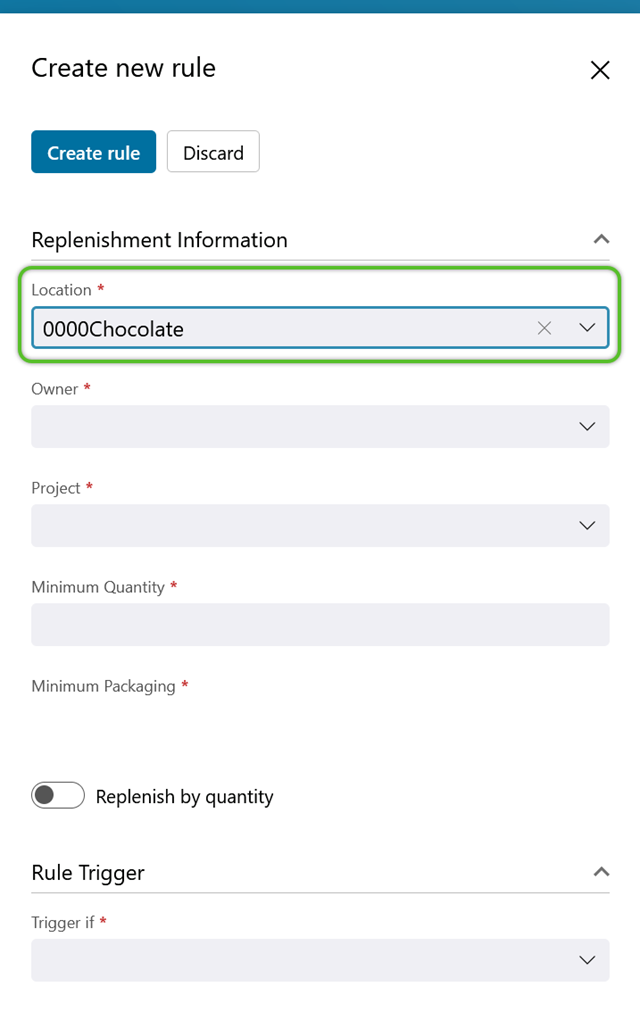
2. Select the required Minimum Quantity and Minimum Packaging to trigger the replenishment.
These determine the minimum amount of the Materials and Material Packagings available in the Location before requiring replenishment.
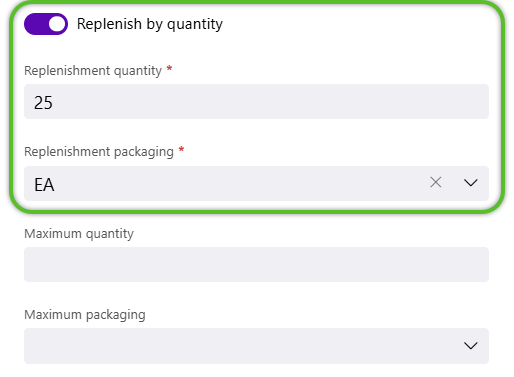
3. To Replenish by Quantity, click the toggle to enter the required Replenishment Quantity and Replenishment Packaging.
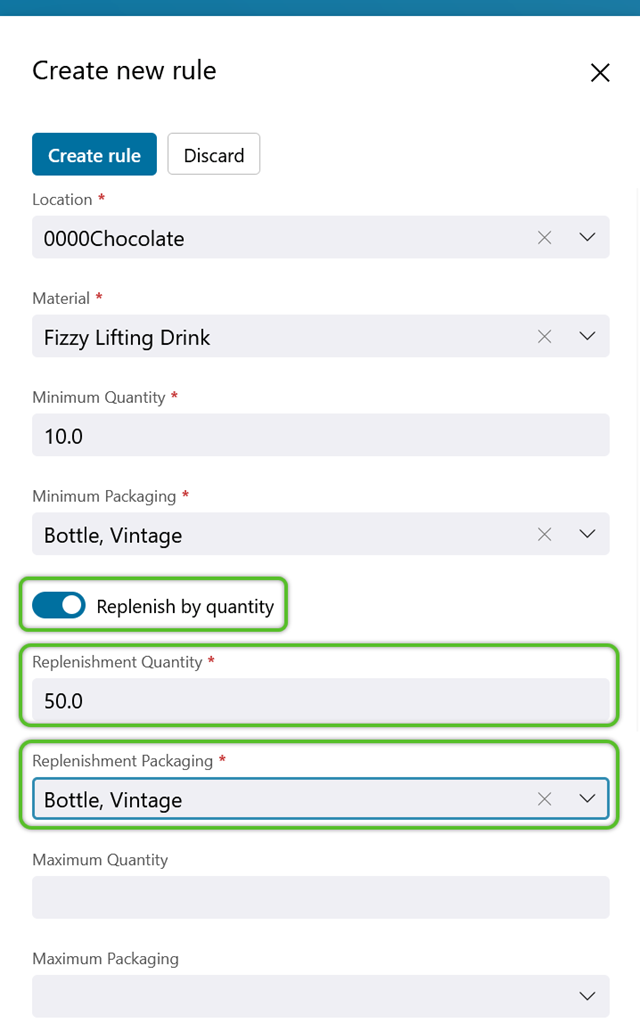
4. If necessary, set a Maximum Quantity and Maximum Packaging.
5. In the Rule Trigger section, select a required Trigger If option from the drop down.
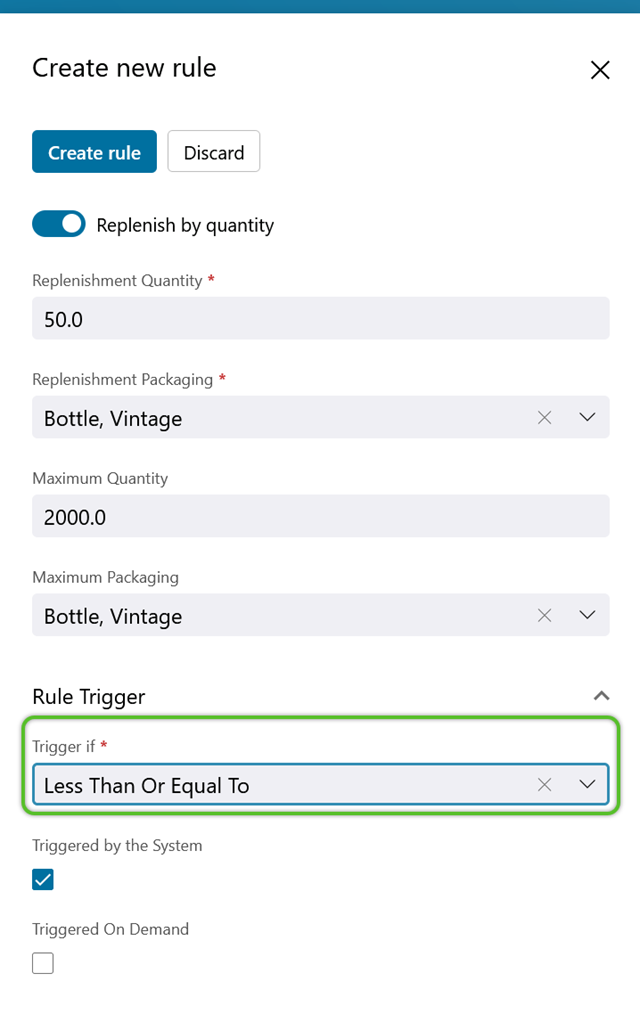
The Triggered by the System box is checked by default.
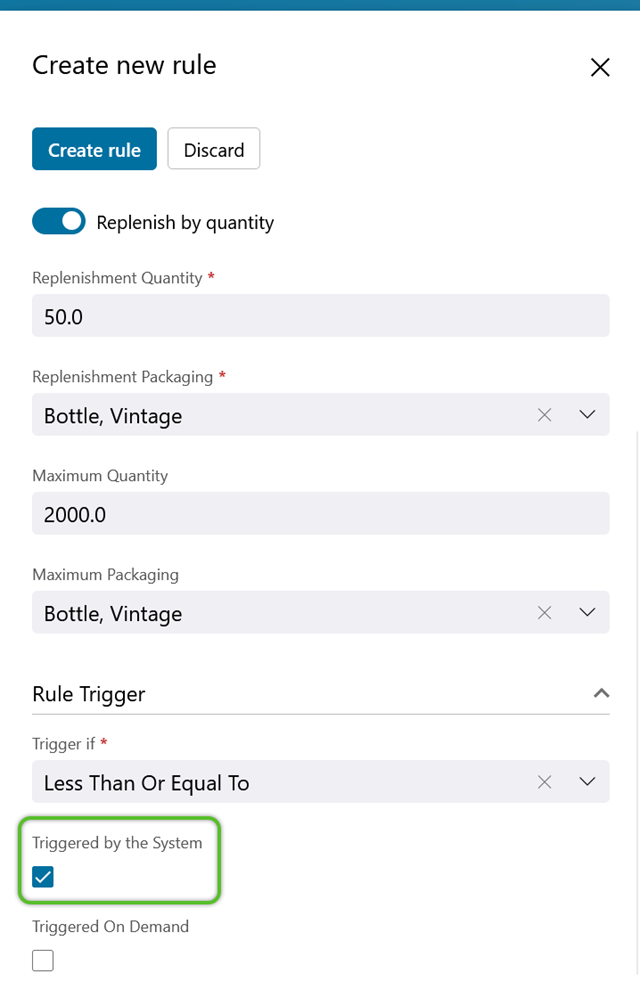
6. When necessary, check the box to allow the Replenishment to be Triggered On Demand.

1. Once the details for the new Replenishment Rule have been set, click the blue Create Rule button at the top of the window.
The new Replenishment Rule will go into effect immediately.
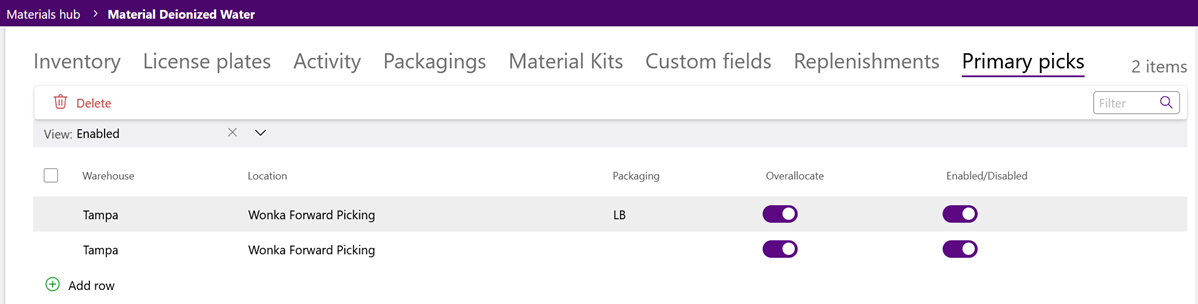
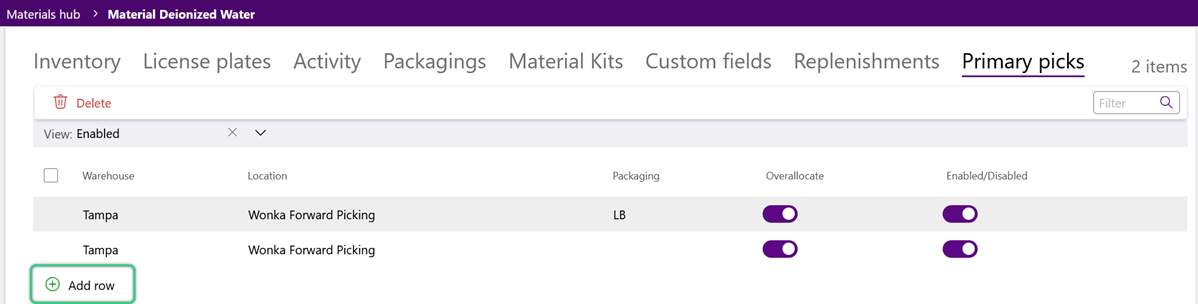
2. Click the green + Add Row option in the bottom left of the tab.
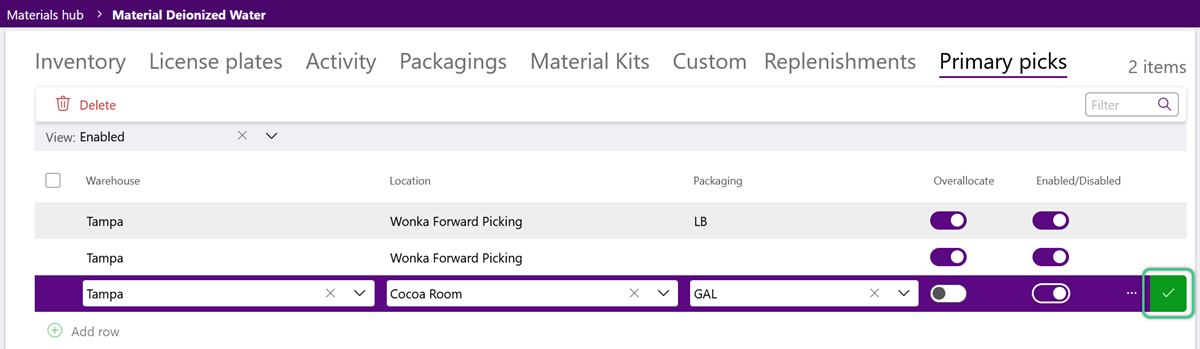
3. Enter the Warehouse, Location, and Packaging, and set the Overallocate and Enabled/Disabled toggles as needed.

4. Click the green check mark to Save the Primary Pick Location.
| Last Updated: |
| 06/06/2025 |
Copyright © 2026 Datex Corporation